Getting your account setup right - Part 2
 Franz Jachim on Thu, 12/15/2011 - 16:55
 A few days ago I started posting about Refinders account setup.
Here is part 2 and it´s probably a bit more juicy, as I´m going to cover the optional connectors of Refinder.
Under "Download Connectors" on the Account Settings page, two separate pieces of software, the Refinder Outlook Connector and the the Refinder URL Handler are currently offered, which, once downloaded to your PC, greatly enhance the scope of Refinder.
Note, that these connectors require Microsoft Windows XP or higher and the .NET Framework (Version 3.5 or higher).
The Refinder Outlook Connector
The Outlook Connector integrates Refinder with your Microsoft Outlook (Version 2007 or higher) email application. After installation, Refinder appears as an additional service in your Outlook client. By that, you can transfer mails, contacts or calendar entries into Refinder, where they appear as Things with the corresponding Thing type (so an Outlook Contact shows up in Refinder as a Thing of type "Person", an Outlook calendar entry as a Refinder "Event").
Authorizing Outlook
Before you can do so, you need to authorize Outlook to interact with your Refinder account:
- After launching Outlook, a dialog window, titled "Refinder Options", appears.

- Click the "Connect" button, which causes your browser to display a Refinder page with an authorization request.
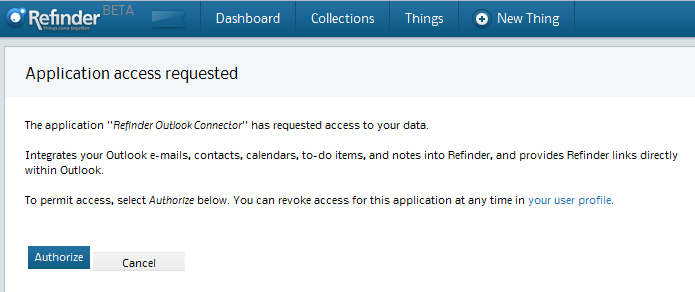
- Confirm by selecting "Authorize", which reloads the page, now displaying an "Access permitted" page with a 10-digit code in a box, which you need to copy and paste back into the "Refinder Options" window in the field labeled "Enter verification code".
- Select "Close" to finalize the Outlook Connector setup.
Using the Refinder Outlook Connector
Refinder lets you either import all of your Outlook items in bulk, or import them individually as needed.
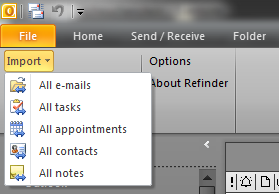
- To import Outlooks items in bulk go to the Outlook tab named "Refinder".

- Chose "Import" in the ribbon under the "Refinder" tab, to import all mails, tasks, notes, calendar entries, contacts or notes.
- "Your recent things" launches the browser, displaying the "Things" page.
- Similar, "Your Refinder profile" gives you quick access to the profile page.
- "Options" brings up the options dialog window, which you know already from the authorization procedure.
Import individual Outlook items
To import individual Outlook items into Refinder, do the following:
- Open an email (or any other outlook item) and look for the "Refinder" section in the ribbon.
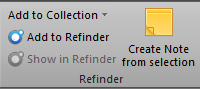
- "Add to collection" lets you import this email directly into a Refinder collection.
- "Add to Refinder" simply adds it to Refinder as a Thing.
- Both actions trigger the appearance of the Refinder sidebar to the right of your mail window, inviting you to relate your email with other Things as well as recommending you further Things, which Refinder identified as probably relevant to the email you are just importing.
- "Show in Refinder" opens a previously imported item in the browser.
- "Create Note from selection" lets you import a highlighted part of the mail, e.g. a paragraph, as a Thing of type Note into Refinder.
Another method to import Outlook items into Refinder is available via the context menu. Right click on any Outlook item and select "Add ..." or "Add to collection".
The Refinder URL Handler
With the URL Handler installed, you can experience a nice extra from your local Refinder - Outlook integration. URL Handler allows you, to open Outlook items directly from out of Refinder.
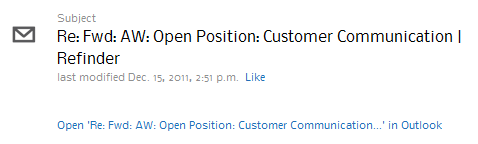
Think of an email or a contact, that you previously had imported into Refinder. Refinder adds a link to these Things, that causes Outlook to start and to display the original mail or contact. For example, use this link if you want to effortlessly retrieve an old email that had disappeared in one of your countless Outlook folders. There´s just one restriction: This feature works only as long as your Outlook runs on the same computer as your browser.
Deauthorization and uninstall
- To deauthorize the Outlook Connector, go to "Authorized Connectors" in the "Account Settings" menu and uncheck the "Refinder Outlook Connector" box.
- To uninstall the connector from your Windows machine, use the program uninstall function from the Windows Control Panel.
Next week, in the last part of these series, I´m planning to take a closer look at the Refinder Recommender Services and how to connect Refinder to certain Online Services.
Stay tuned.
Tags: